Managing quality and feature updates (WUfB) with Microsoft Endpoint Manager
Stay in control, in an automated way.

Microsoft Endpoint Manager the future of Client Management
Microsoft is investing heavily in cloud-based solutions and this means that on-premises solutions will be phased out to a greater extent. This also comes to device management and therefore, more and more companies are embarking on their journey towards the cloud and all the benefits that come with it. To kick-start this transition, Microsoft has developed the concept or terminology called “Co-Mangement” where devices have the SMS Agent and Intune agent installed at the same time and where sub configurations in the form of workloads from ConfigMgr can be moved in phases to be managed in Intune instead. Co-Management will not be covered in this article, but you can read more about it in Microsoft docs. What is interesting about this technology is that we can move Windows patching to the cloud as a stand-alone element.
For handling mobile devices and desktops, Microsoft Endpoint Manager (Intune) is the way to go and is a technology under strong development. WSUS with SCCM, which many system administrators have used for patching PCs, is not an option in the future. For a replacement, Windows Update for Business (WUfB) is the solution. You can read more about WUfB here Microsoft docs.
There are many pros and cons between the two technologies – to boil it all down – WUfB with Endpoint Manager does not share the strict control that you get with SCCM with in-depth reporting and limitation of patches to computers using collections and where you distribute patches. But WSUS, on the other hand, is a heavy and old technology that will most likely not be developed much further.
Another challenge with WUfB is that all updates come from the cloud and you will put a lot of pressure on your WAN line if you do not make your rollout in phases. Especially in large enterprises with thousands of devices. This is exactly the lining we will look at in this article.
“So how do we stay control when we move the workload from WSUS to WUfB?”
As stated in the docs we can only limit patches and control the rollout on the client using CSP profiles to defer or pause updates – bummer… that means we must segregate devices into groups like collections in SCCM to control the configurations on the clients and stay in control and do phased rollouts. Below is my suggestion on how to tackle this puzzle and still stay in control when rolling out patches and features using groups. For this we will leverage the functions of Azure Automation Runbooks where we can define group memberships with PowerShell.
The Azure Automation runbook functionality:
- Setup should consist of device-only groups (because of limitation in the Intune assignment engine as it does not support include/exclude of mixed user and device groups).
- Setup should consist of 4 rings:
- Early Adoption (Ring 1)
- Early Verification (Ring 2)
- Early Production (Ring 3)
- Global Production (Ring 4)
- Device rings to be divided into a desired number of subgroups to support staged rollout and limit WAN utilization.
- Ring 1,2 and 3 to be defined by users’ primary devices (owned devices in Azure Active Directory) from dedicated user groups.
- Ring 1,2, 3 and 4 to include devices from dedicated device groups to support users to have multiple devices in different rings (device membership will win in case a user is in ring 2 with a device on a device in ring 1).
- A device group to exclude devices for the setup.
- All groups used must support nested groups to easily include other dynamic groups or groups synchronized from AD Sync.
- Device objects can only be a member of one ring/group.
- Fully automated with no maintenance.
The Automation script is found on GitHub here.
Automation script logic explained:
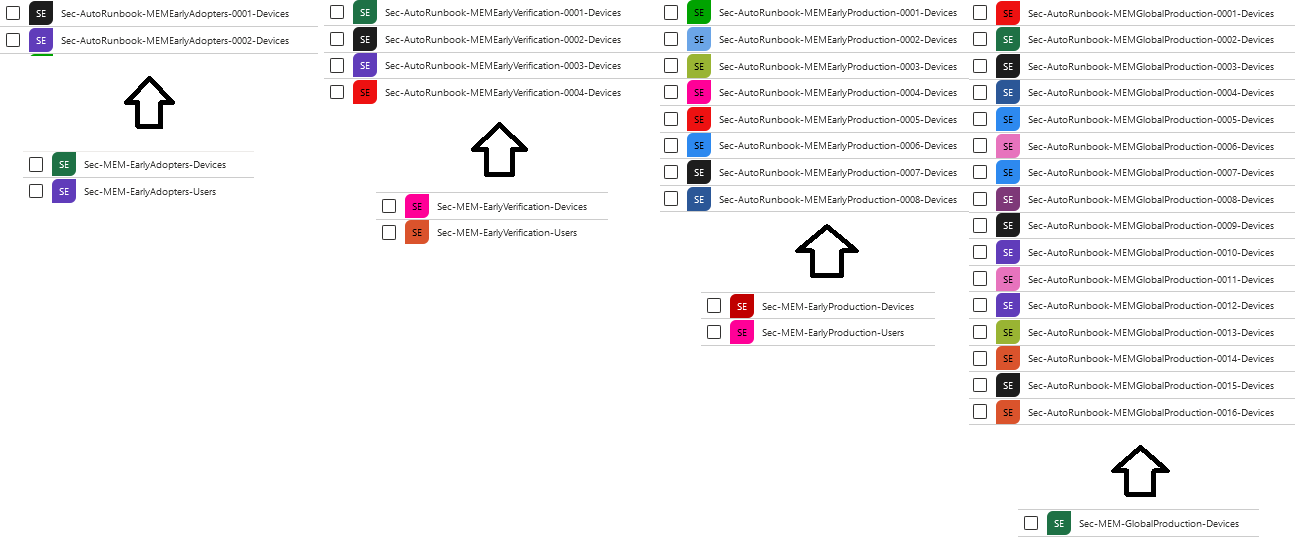
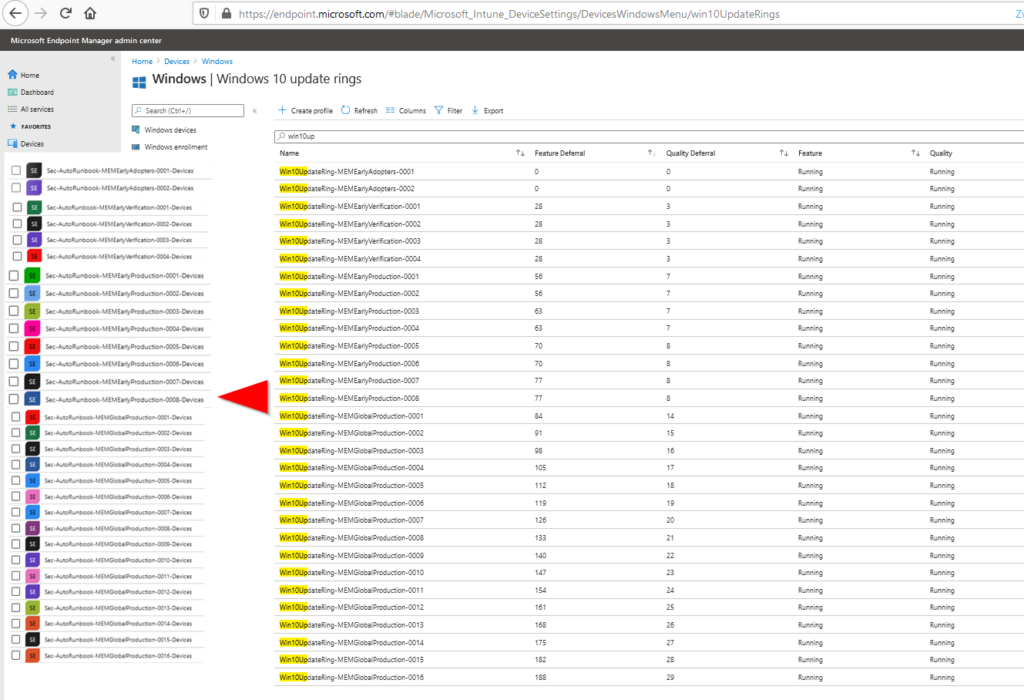
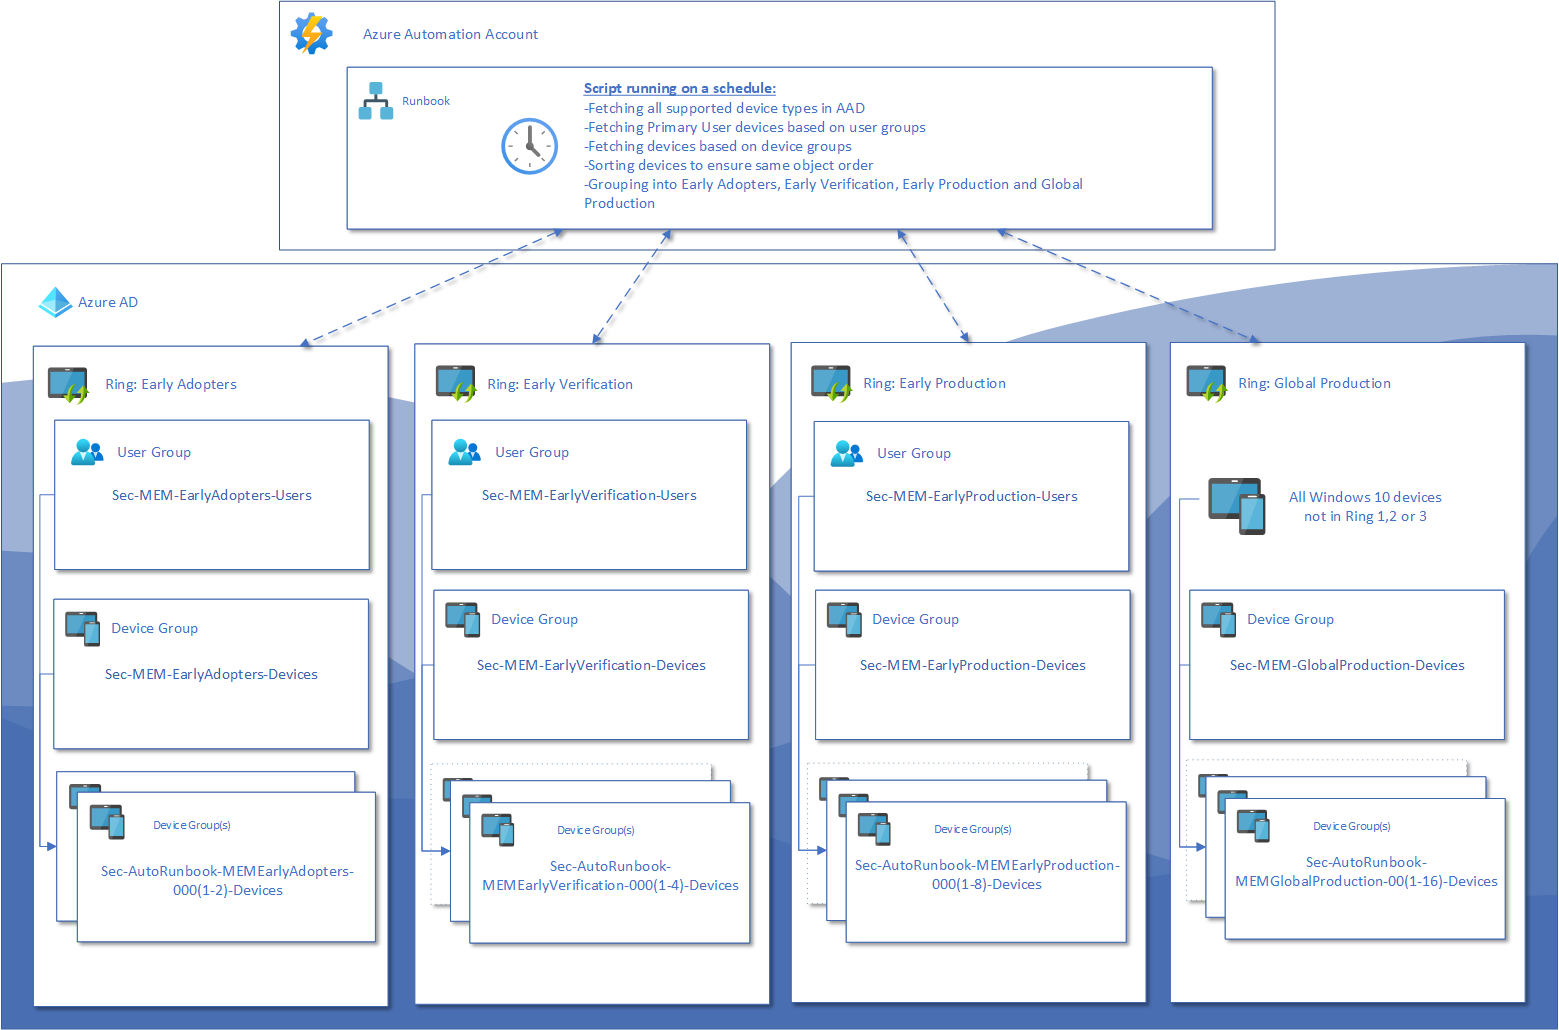 The script distributes devices evenly across each ring subgroup (Sec-AutoRunbook-[Ring name]- [index number]-Devices) based on the desired number of subgroups specified at the top of the script for each ring variable. By default, they are set to resp. 2, 4, 8 and 16 where Ring 1 has 2 subgroups:
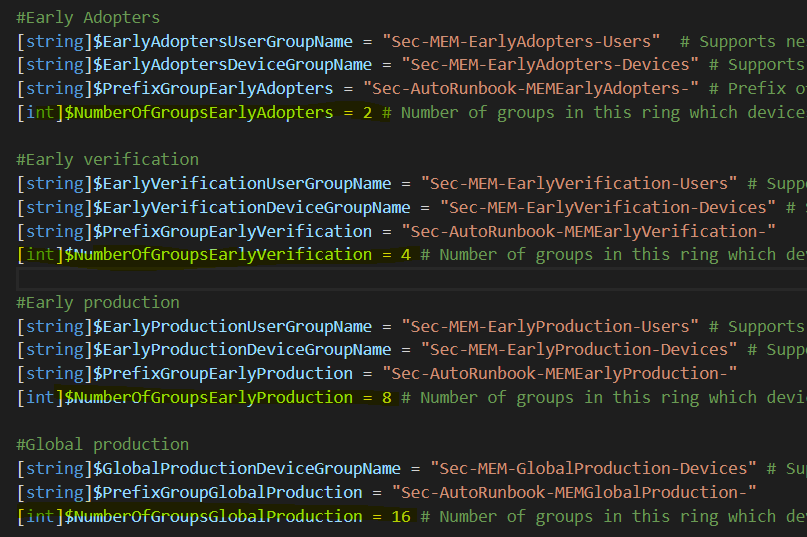
If the groups do not already exist, they will be created, even if you later change the values after the first run. Let us take an example: if you have 7 devices in Ring 1, the distribution will be spread like this:
- Sec-AutoRunbook-MEMEarlyAdopters-0001-Devices = 4 devices
- Sec-AutoRunbook-MEMEarlyAdopters-0002-Devices = 3 devices
If you then change $NumberOfGroupsEarlyAdopters to 3, the distribution will be changed to:
- Sec-AutoRunbook-MEMEarlyAdopters-0001-Devices = 3 devices.
- Sec-AutoRunbook-MEMEarlyAdopters-0002-Devices = 3 devices.
- Sec-AutoRunbook-MEMEarlyAdopters-0003-Devices = 1 device.
If you change your mind and change $NumberOfGroupsEarlyAdopters back to 2, the distribution will be changed to:
- Sec-AutoRunbook-MEMEarlyAdopters-0001-Devices = 4 devices.
- Sec-AutoRunbook-MEMEarlyAdopters-0002-Devices = 3 devices.
- Sec-AutoRunbook-MEMEarlyAdopters-0003-Devices = 1 devices (device membership will remain as the script now only will maintain 2 groups).
Groups will never be deleted, only created.
What you need for the setup:
- Automation setup:
- Azure Subscription.
- Automation Account.
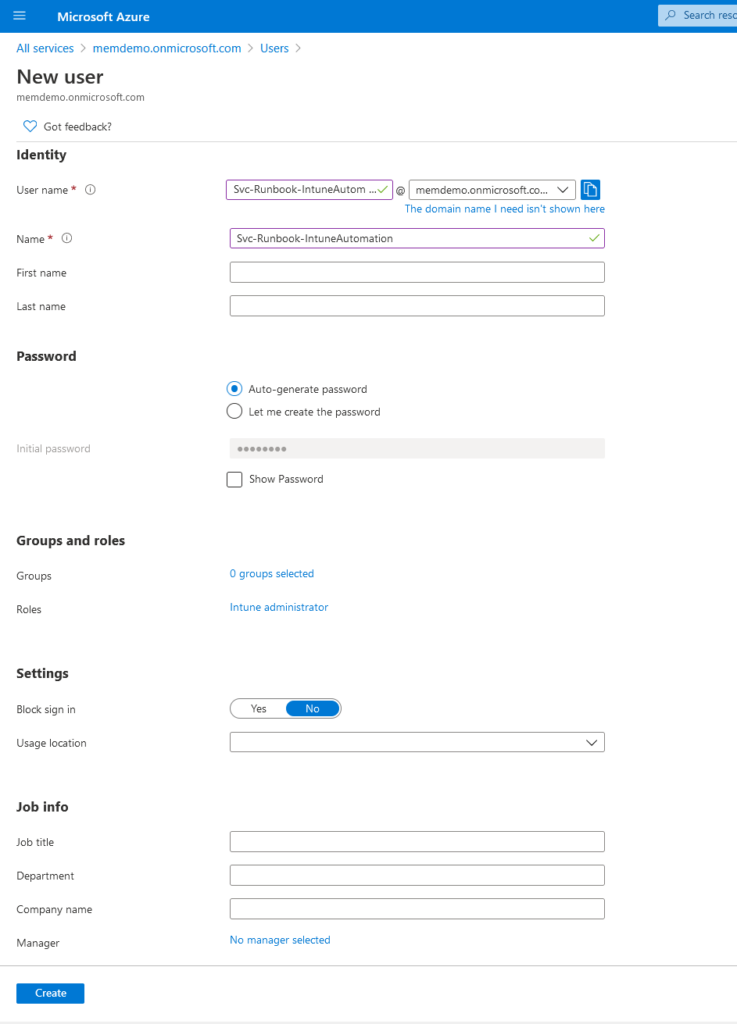
- Service account with the “Intune Administrator” role and excluded from any MFA/Conditional Access rule.
- Runbook on a schedule.
- Microsoft Endpoint Manager Windows 10 update rings (CSP’s).
- User with “Intune Administrator” rights.
We will start with the automation setup as this will create the foundation for our CSP profiles.
Easy peasy! Let’s get to it…
Step 1. Automation setup
- Create a Subscription or use an existing:
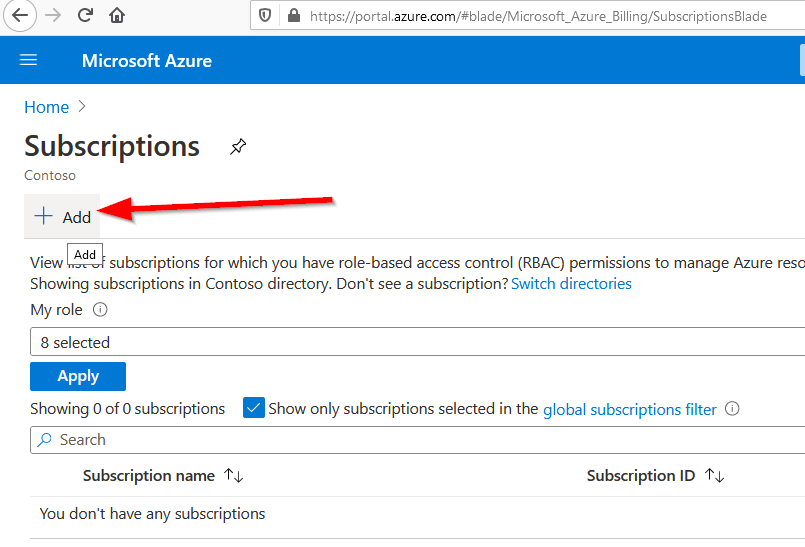
- Go to the Subscription and add a resource group:
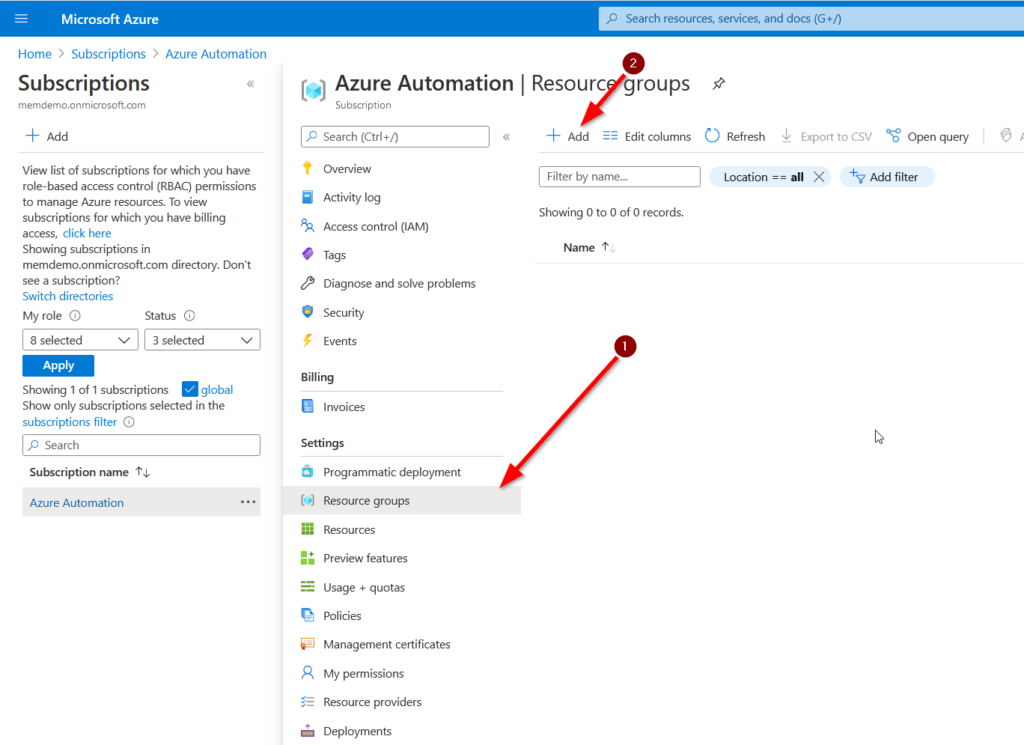
- Create new resource group:
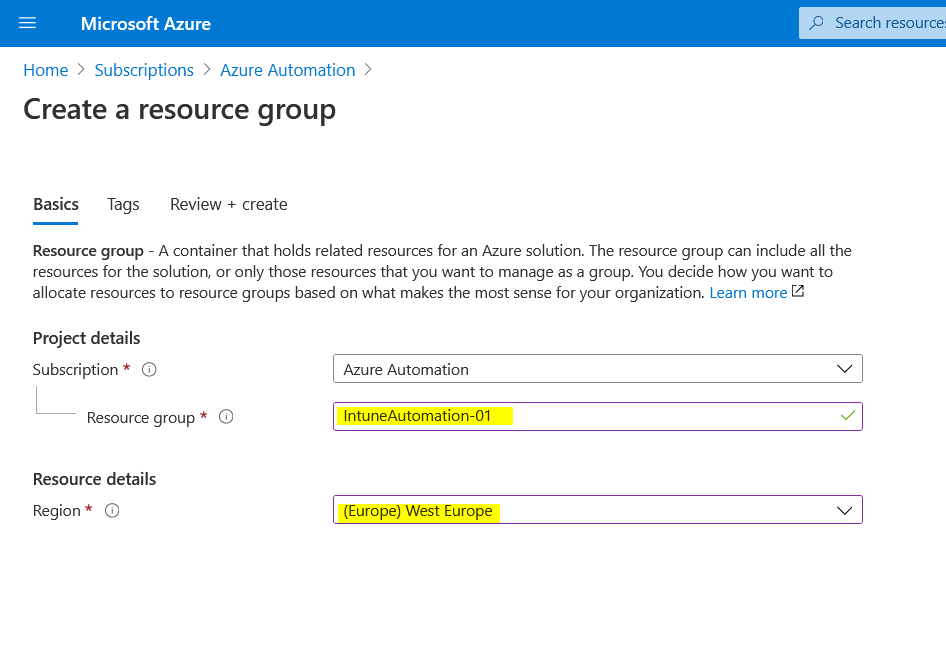
- Add resource to the resource group:
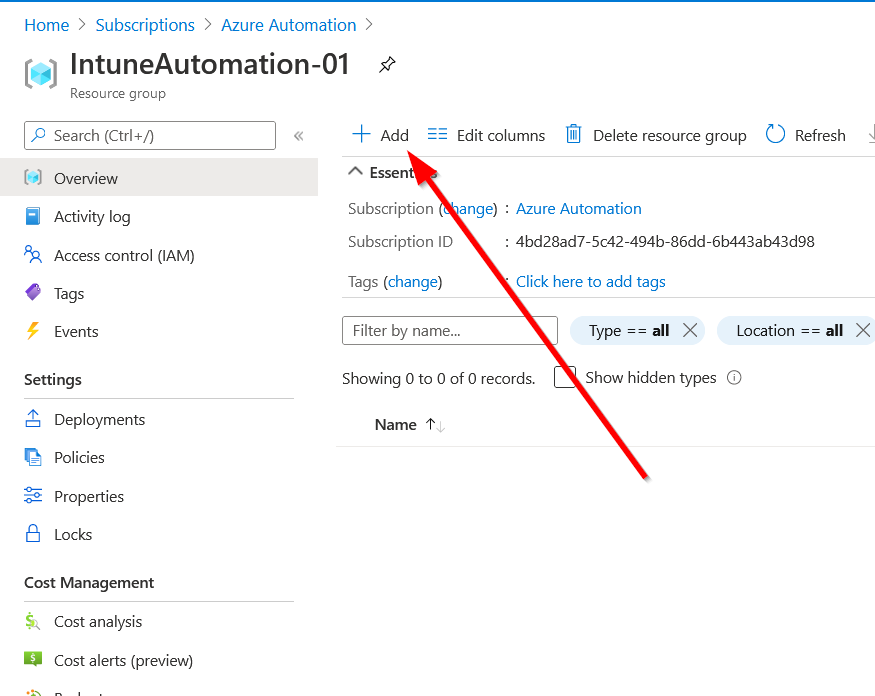
- Add Automation:
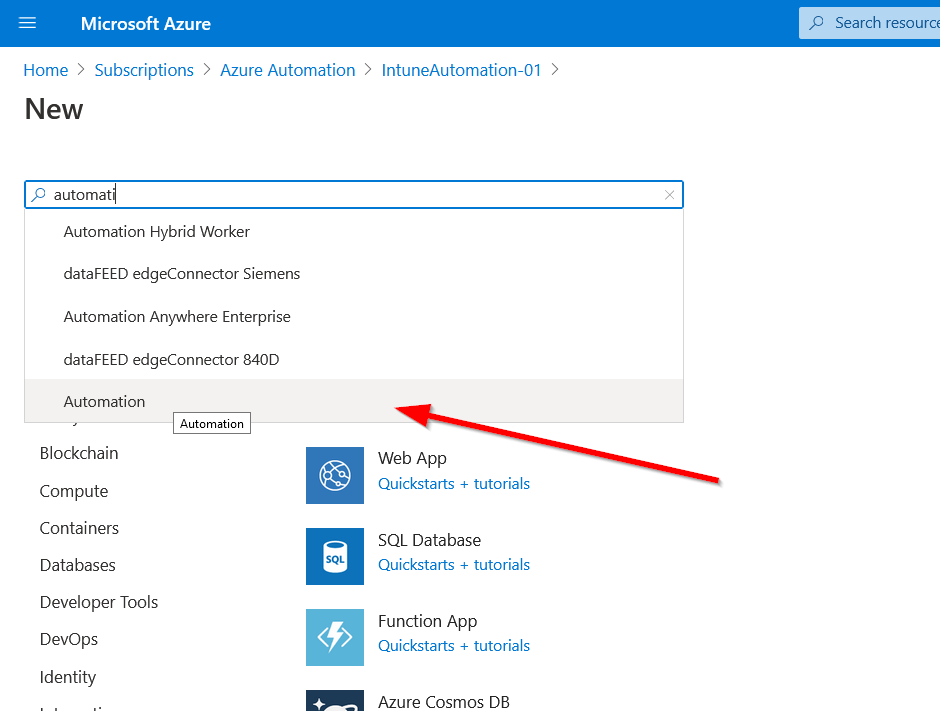
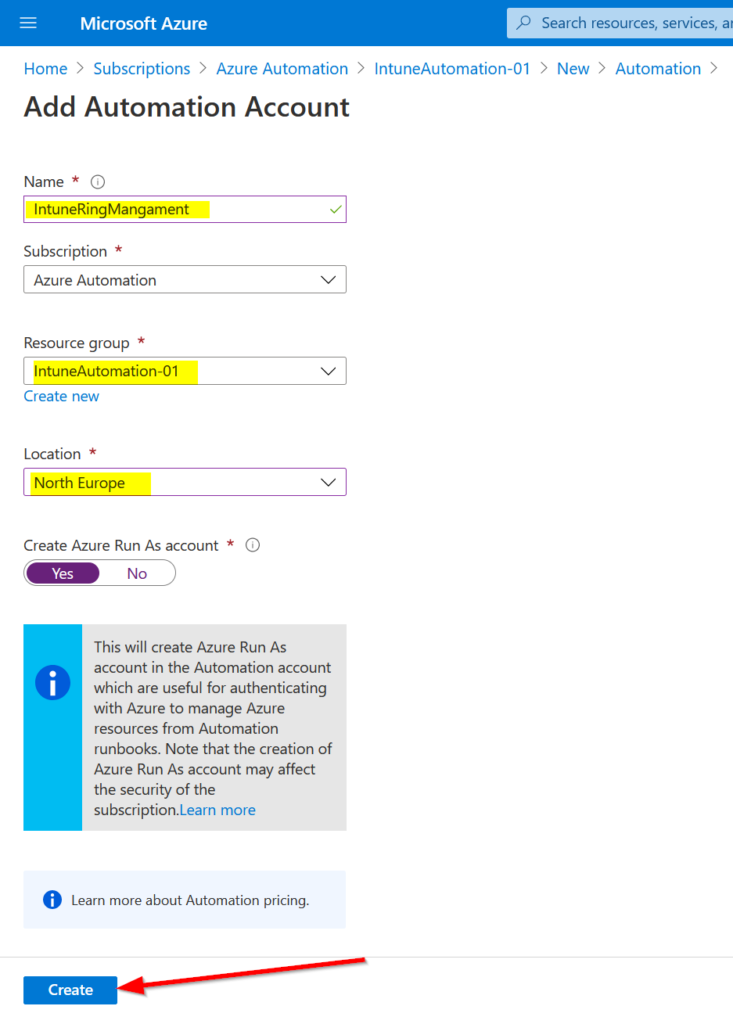
- Click Create:
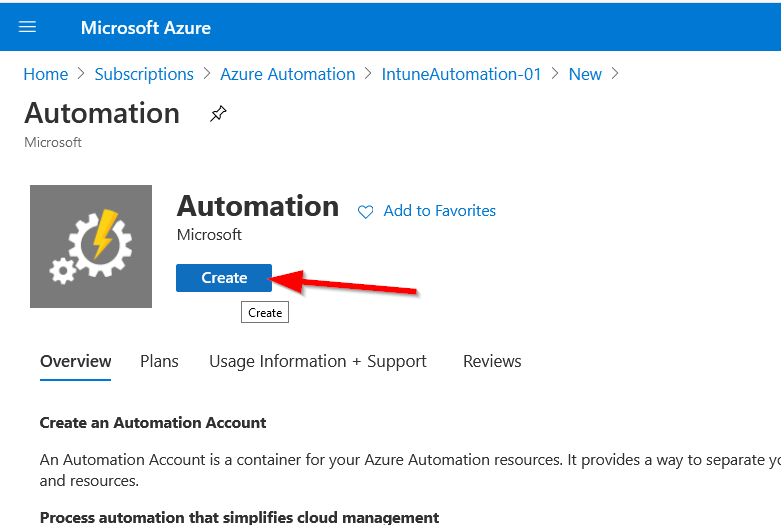
- Add Automation Account and ensure that Run As Account is set to “Yes”:
- Now create the service account:
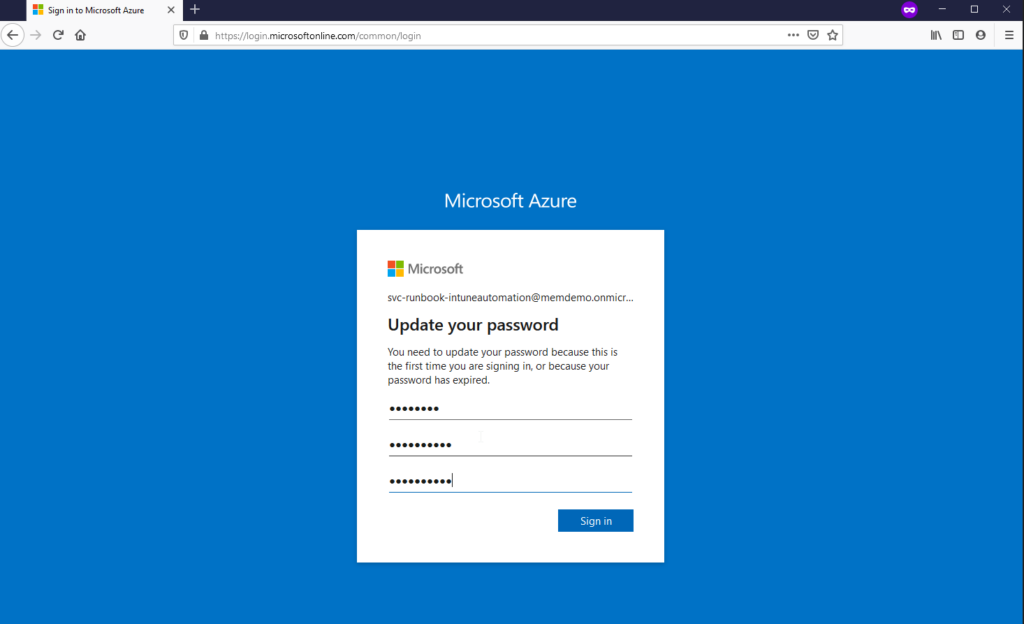
- Login the first time with the service account and define the future password (save for later):
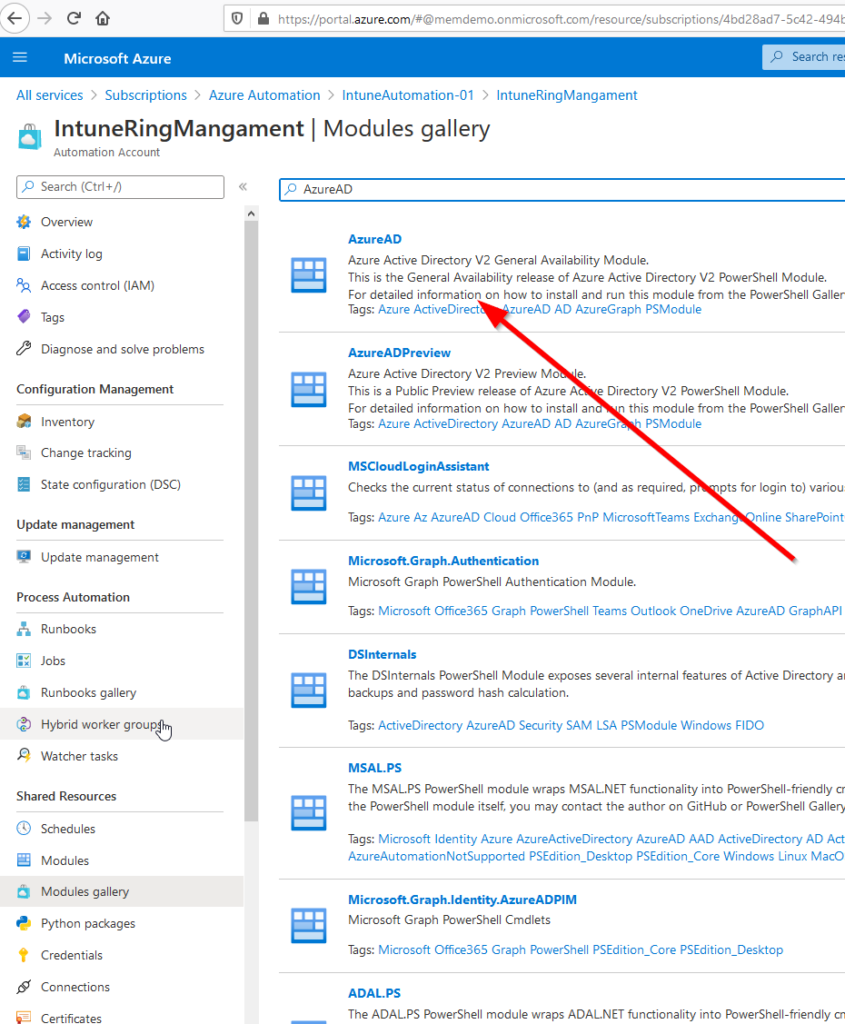
- Add AzureAD module from the “Modules gallery” to the Automation Account:
- Go to the “Credentials” section:
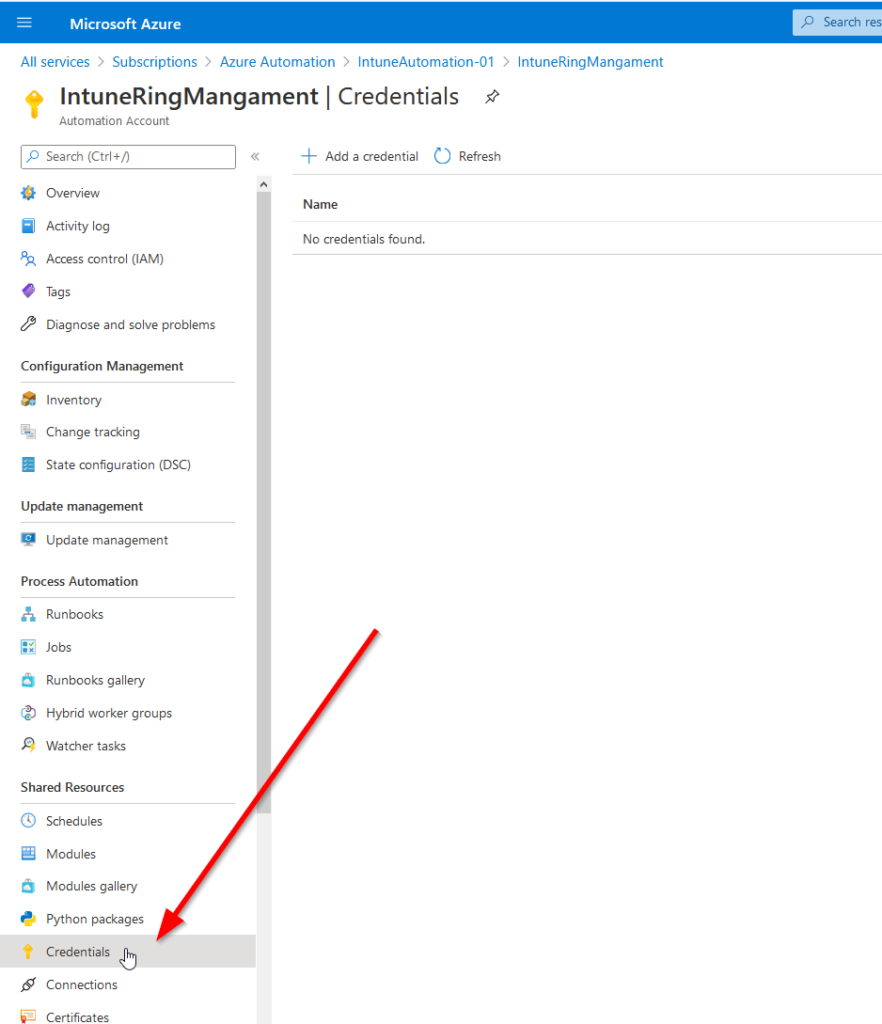
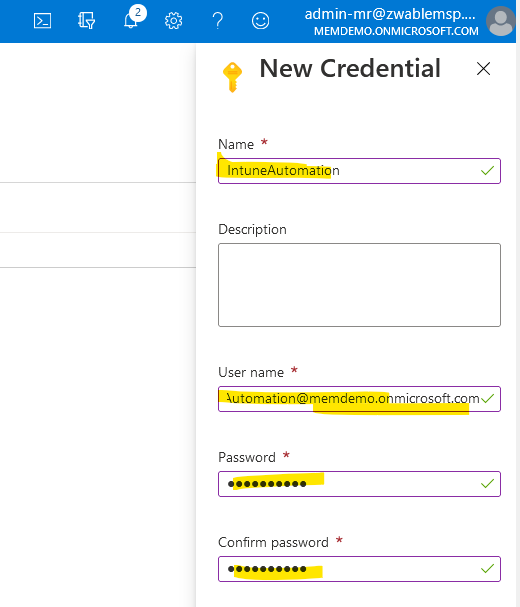
- Add the service account with the name “IntuneAutomation” (name referred to in script):
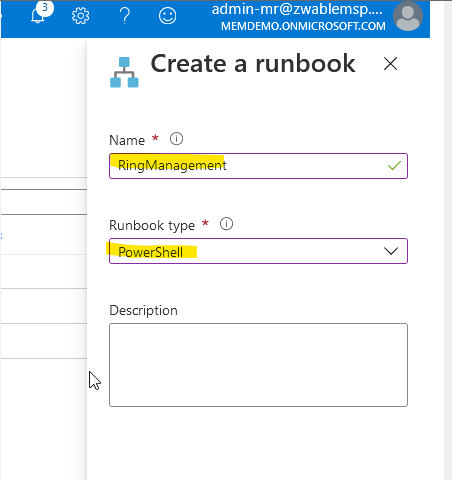
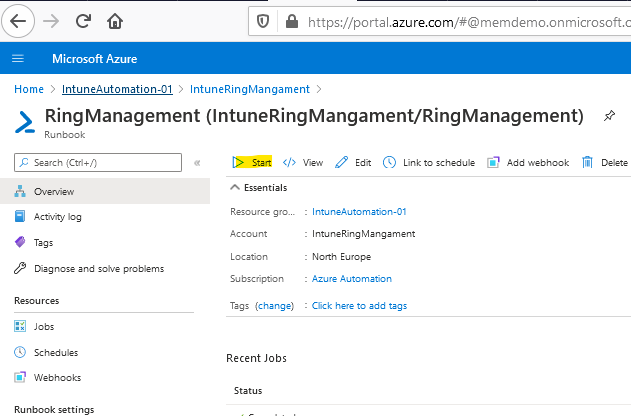
- Create a new runbook in the Runbook section at the automation account:

- Give it a name and configure as a PowerShell Runbook type:
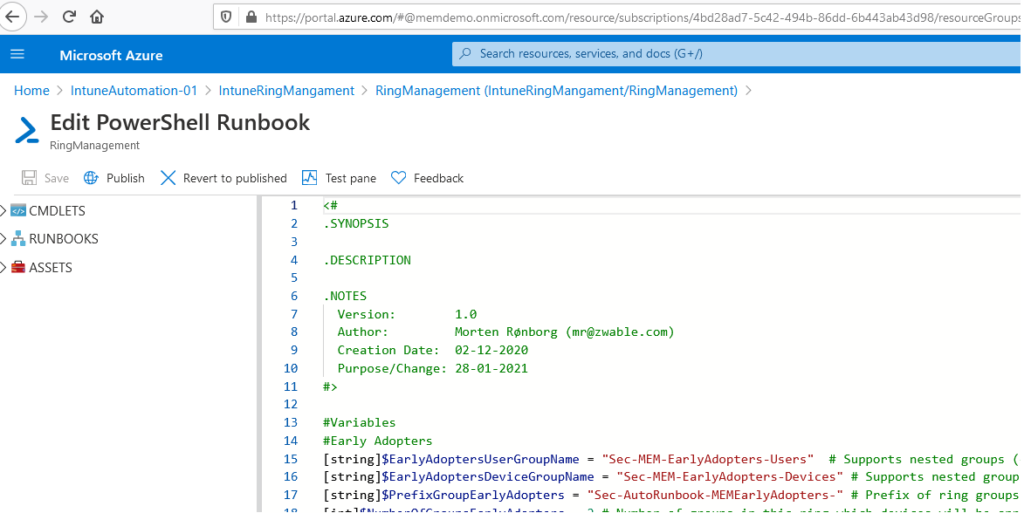
- Click on “Edit”:
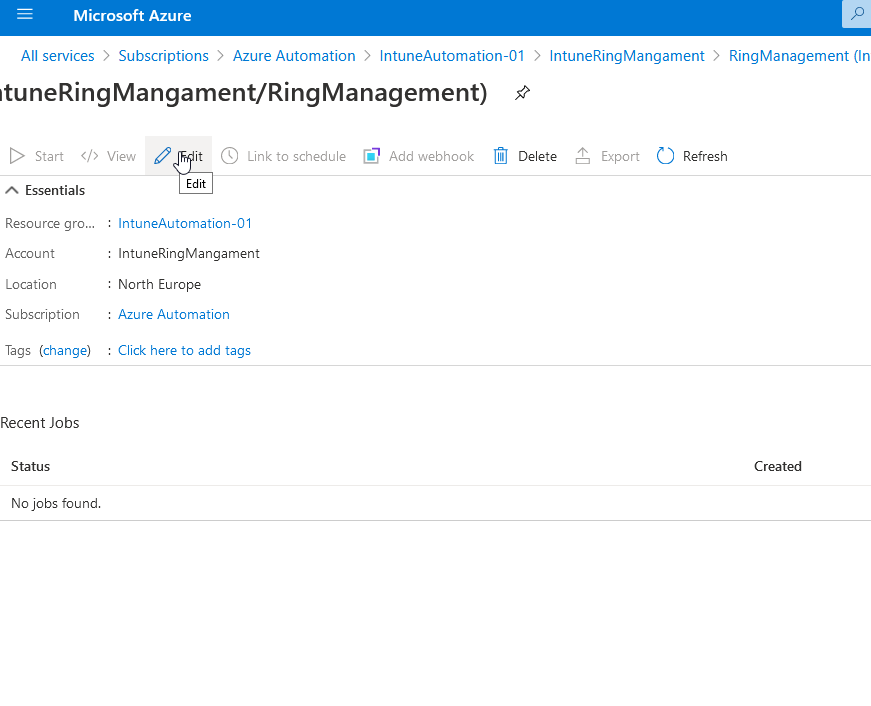
- Copy and paste in the script and click “Publish”:
- Click on “Start”:
- On the first run the script will create groups according to the Visio drawing illustration. The first run might take a long time based on the number of devices in your environment. In my case it took 3 hours to distribute 20k devices across the groups and 20-40 secs on the following runs:

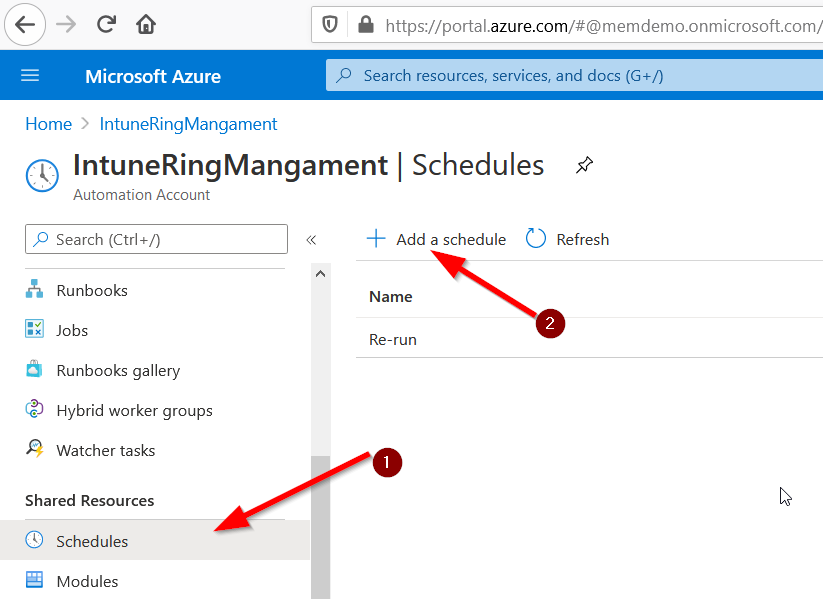
Now put the job to run on a schedule like once an hour:
Below are the current user ring memberships we have I our environment for inspiration:
- Sec-MEM-EarlyAdopters-Users. Group membership:
- IT Department (AD Synced)
- Sec-MEM-EarlyVerification-Users. Group memberships:
- Application Owners (AAD Group)
- Sec-MEM-EarlyProduction-Users. Group memberships:
- Directors (AD Synced)
- Managers (AD Synced)
Now that we have the automated groups in place, we can move to the CSP profiles and assignments.
Microsoft Endpoint Manager Windows 10 update rings:
Before we dive into the configurations, it’s important to understand how Microsoft’s rollout pattern is put together. In general, they are divided into two types:
- Quality updates
Published on “patch Tuesday” which is on the 2nd Tuesday of the month. - Feature Updates (Microsoft doc.)
Published twice a year.
Below you can see how we have chosen to use the automation rings for a design that makes a phased roll-out and ensure that you stay in control and can press the stop button (uninstall / pause) in time if it turns out that an update sets a business-critical application out of play. Each AAD group will have it’s own CSP profile.
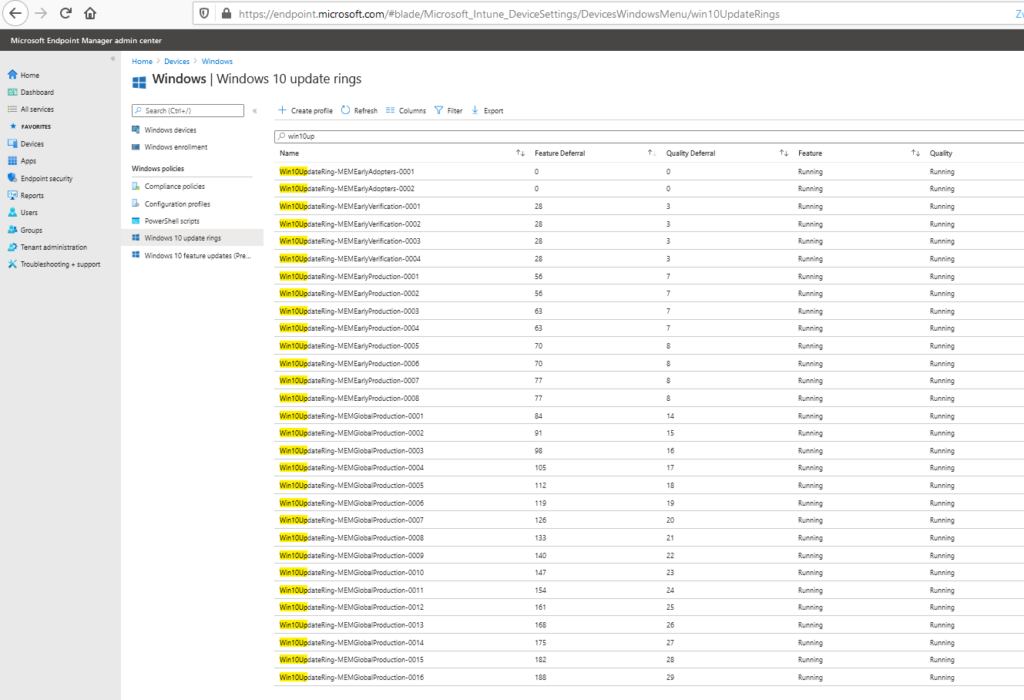
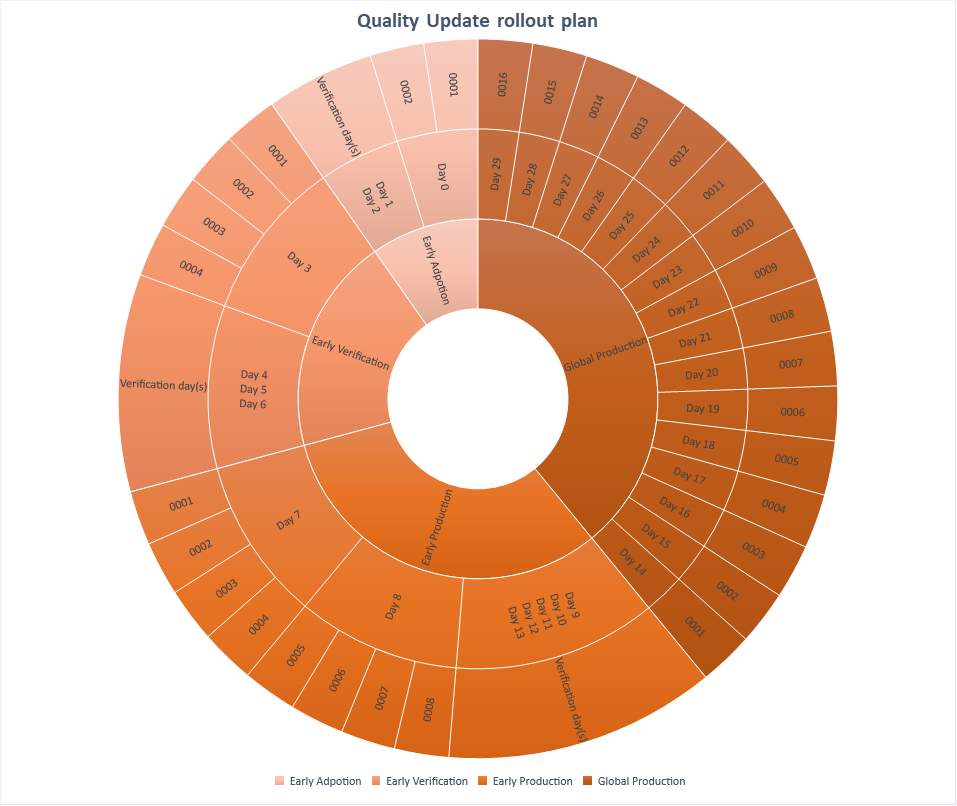 Above is shown how Quality Updates are rolled out over 30 days from the day a new update is released using the “Defer” property on the CSP profile.
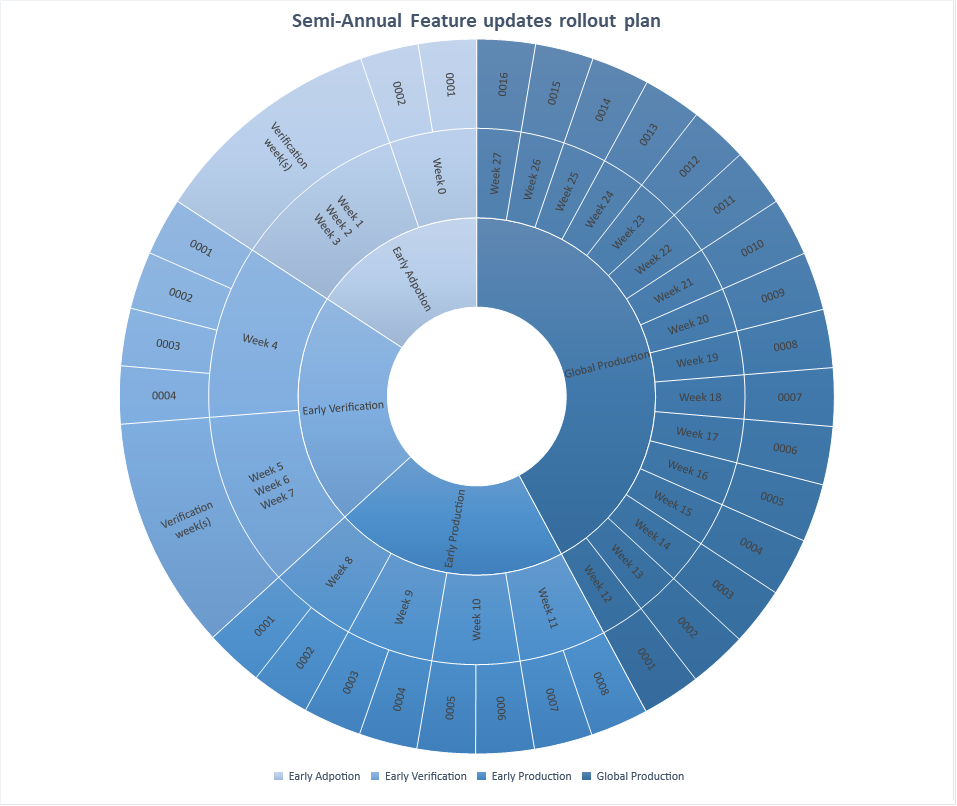 Above is shown how Feature Updates are rolled out over 189 days from the day a new update is released using the “Defer” property on the CSP profile.
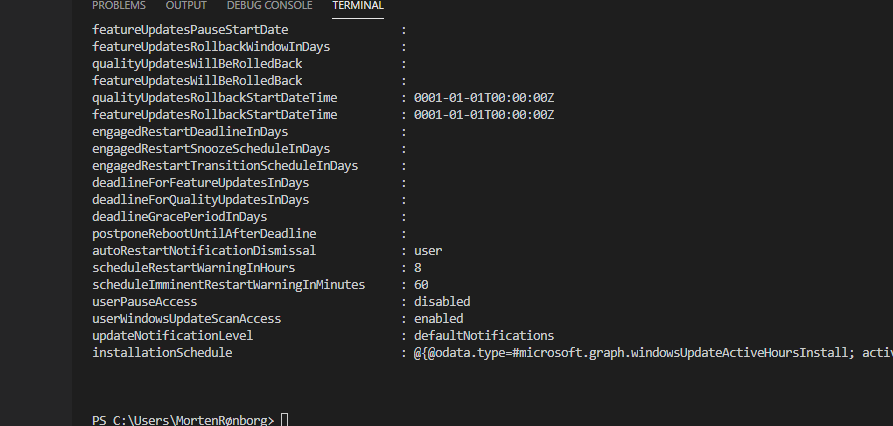
There are several settings on the CSP profiles to configure as needed. Below is a description of how we will set up ours, to best match the business and bother the users as little as possible.
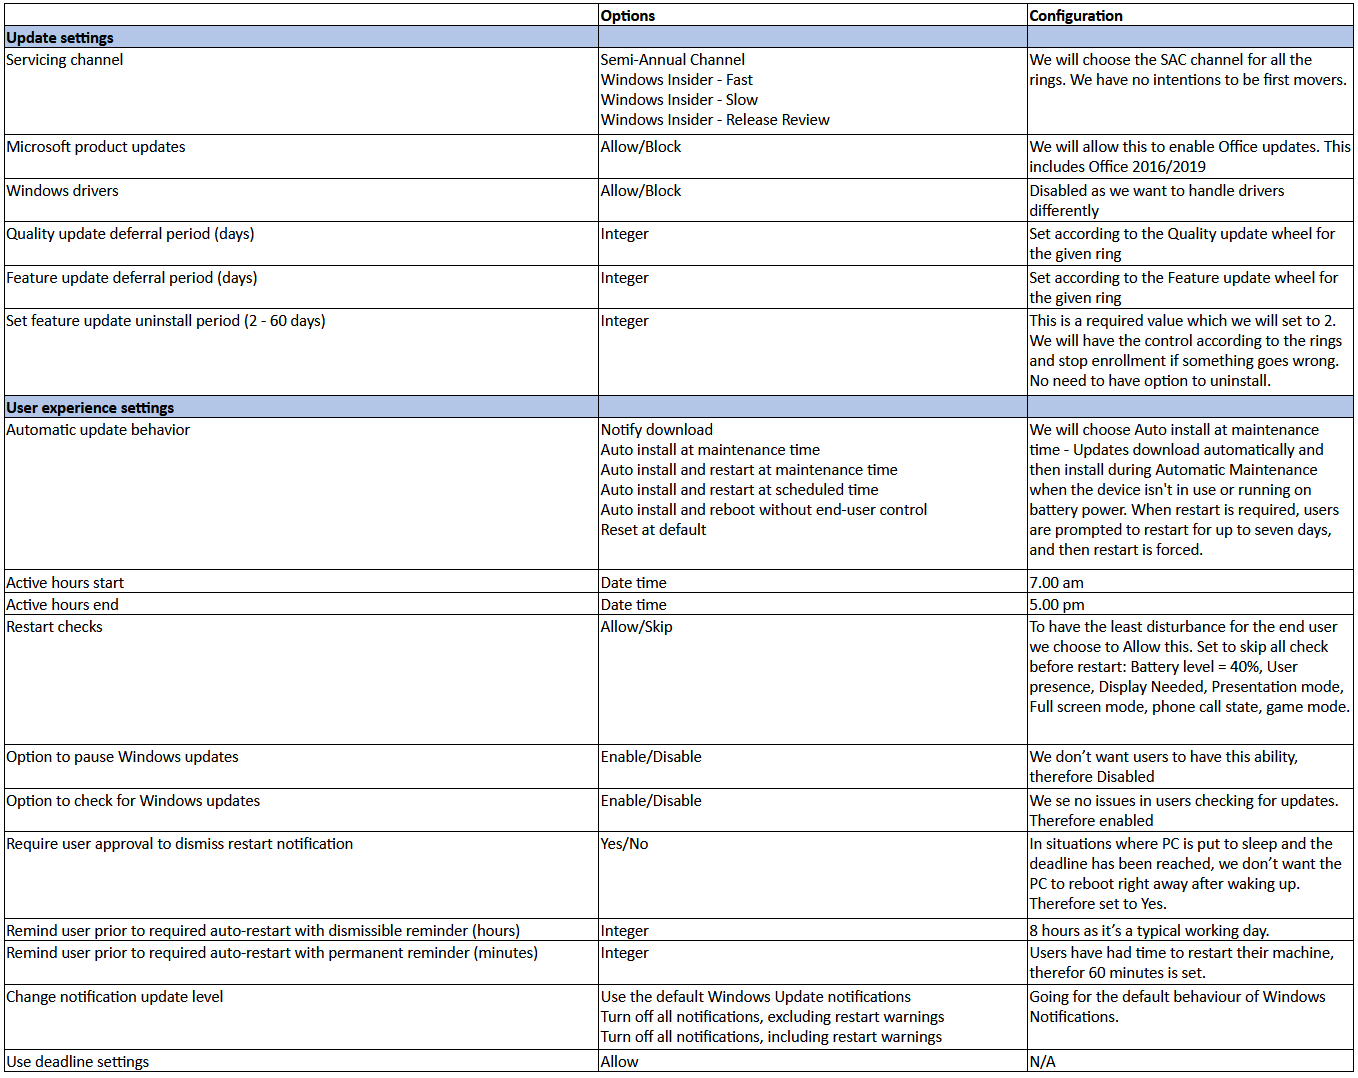
Microsoft Endpoint Manager Configuration profiles (CSP’s):
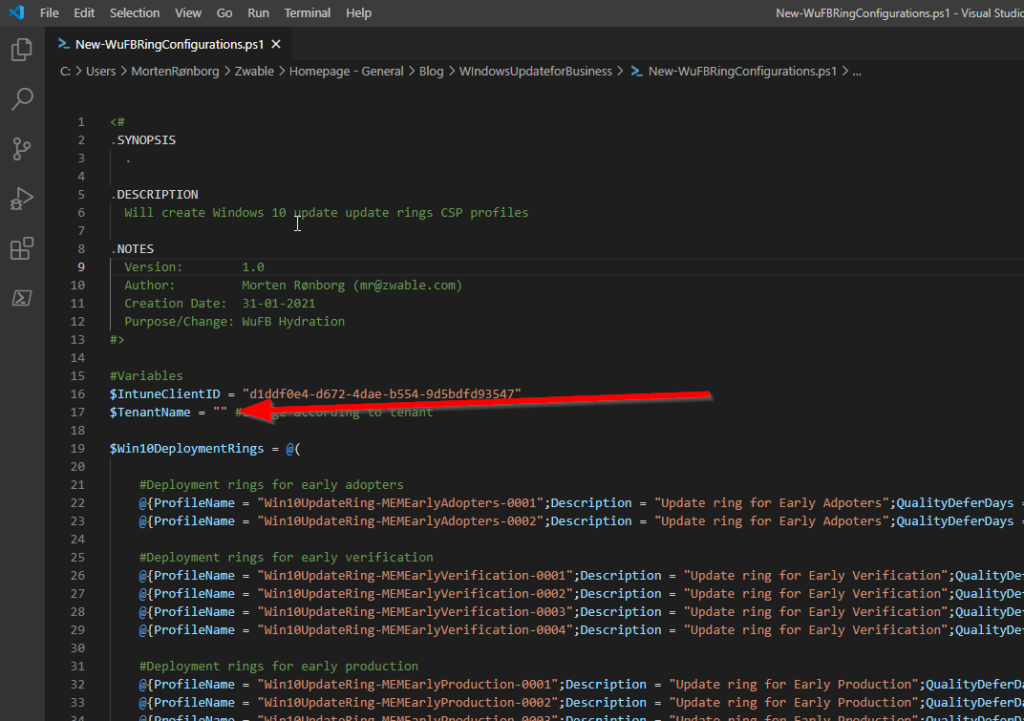
In order not to spend too much time creating CSP profiles, we have created a script to create the 30 profiles with the “Defer” dates according to the Quality and Feature update wheels.
The Windows 10 update ring hydration script is found on GitHub here.
Step 1. Windows 10 update rings creation and assignment
- Open the script and change the $TenantName variable to suit your organization (e.g. contoso.com):
- Run the script as an Local Administrator, the script will install the module AzureADPreview in order to facilitate the credentials prompt. Type in your administrative Intune account:
- The script will write output for each profile created:
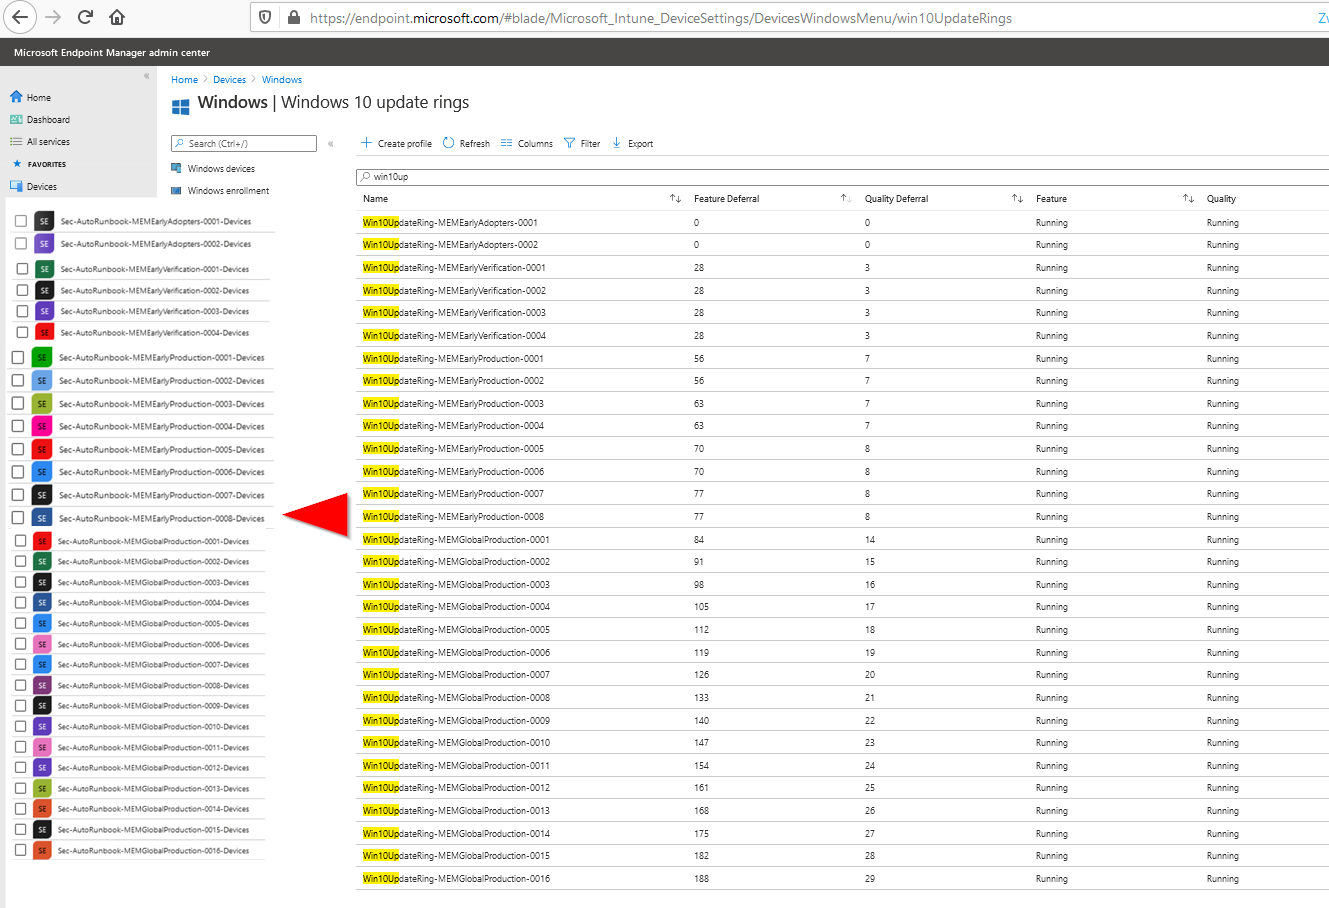
- Go to https://endpoint.microsoft.com and validate the profile creation:
- Now create the assignment for each profile to their corresponding automation groups:

That was it, now we have an automated solution and rollout model for Quality and Feature updates, let us know if it’s something you could use, and leave a comment for improvements or questions for the model.
The next step could be to automate the assignment of device objects to the respective device groups for each ring, so it’s not handled manually by the IT staff when users want a secondary device in a different ring.
Use the contact form below to get help designing your custom patch plan.
Get a no-obligation
IT consultation
Interested in learning how we can act as your internal IT department so you can focus on other things? Book a no-obligation meeting via the form below.
